Six tutorials per class
Six assignments per class
Personalized critiques
Class discussions
2 months, 6 different
tutorials, 6 assignments, critiques by the
instructor and by your fellow students. Packed full of instruction with lots of discussion
about technique, composition, exposure, lenses, gadgets etc., especially as they relate to the
current tutorial.
REGISTRATION
- $180
The registration window is open now through the first two weeks of each
class.
$180 per class. Register online at our
online store or call Carol Leigh at
(800) 49-PHOTO (800-497-4686) to register over the phone.
WANT TO AUDIT THE CLASS? $95
You'll enjoy the benefits of the class, all the instruction, the lessons,
the discussions, the tips, the camaraderie, etc. Everything is yours
except that you won't be receiving
critiques and won't be part of the online gallery. I will, however,
briefly comment on each of your photos. Just $95 to audit the
class.
LIMITED TO 25 PHOTOGRAPHERS
Once you're registered, you'll
receive information on how to access the class, what you'll need, how to
prepare your photos for viewing, etc.
PREREQUISITES
- Access to the Internet.
- If you're a film
shooter, you'll need some way of converting your slides or prints to
JPEGs so that they can be shown online.
- If you're a digital
shooter, you'll need some way of sizing your photos to show them online
as JPEGs.
- Any focal length lens
will work fine. Really. There may be times, however, when you'll want to
move in closer to your subject. A
macro lens is great, but you can easily use extension tubes on whatever
lens you have or else buy a set of close-up diopters that screw onto the
front of your current lens.
- A tripod is necessary, especially for the lessons on "Neon,"
"Motion in Motion," "Kitchen
Art" and for the macro class. These lessons will involve long shutter
speeds (longer than 1/60 second) and so you'll need some sort of support
for sharpness.
WHAT YOU'LL LEARN
How to see creatively.
How to make a
dramatic, striking photograph from the simplest of things.
How to evaluate lighting as a pro would do.
What
separates a professional-looking photo from a snapshot.
Tips on composition and exposure.
Information about little pieces of equipment that can improve your
photography 100%.
|
Developing Your Creative Edge #8
 Lesson
#1 Lesson
#1
Not as the crow flies:
CURVED LINES
Naturally, when we are searching
for curved lines, all we seem to find are straight ones. And that's the
point of this exercise — to look, to see, to notice. You're going to be
finding (and discarding) lots of straight lines in this lesson, in your
search for the quintessential curve.
 Lesson
#2 Lesson
#2
Back to basics:
BLUE
It's just about everyone's
favorite color, so you're thinking this will be an easy assignment, right?
Think again. Sure, there's the obvious sea and sky, but we're going to
explore some of the less obvious, perhaps more dramatic, features of this
color.
 Lesson #3 Lesson #3
Pointy things:
TRIANGLES
Geometry made fun. If you're
obtuse about isosceles triangles, this is the assignment for you. Once you
begin looking, you're going to find three-sided shapes in the most
unlikely of places.
 Lesson #4 Lesson #4
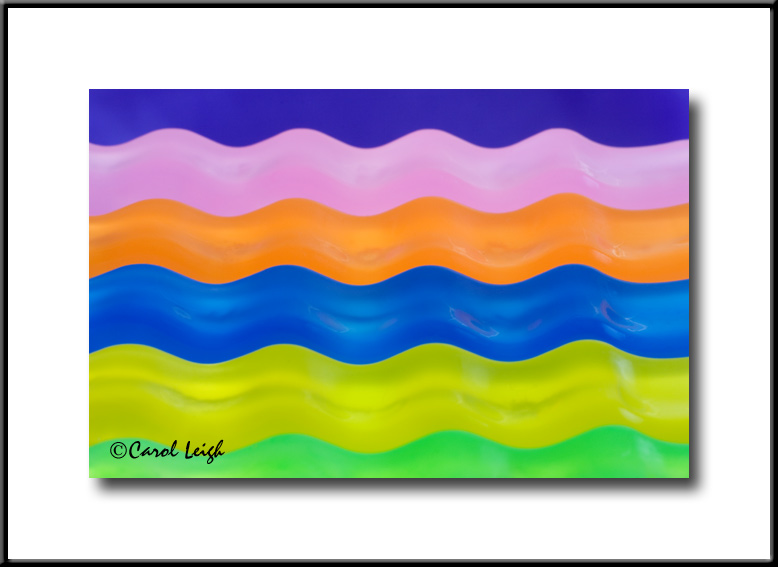
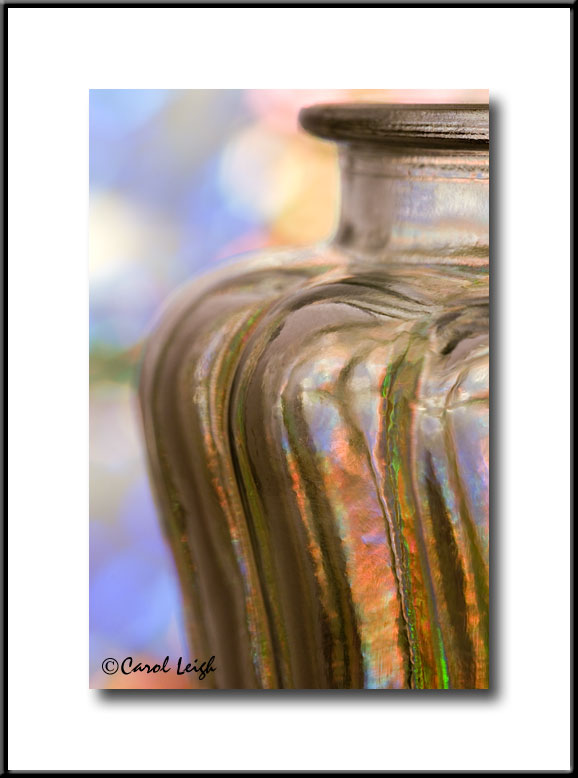
Total abstraction:
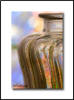
COLORED GLASS
ABSTRACTIONS
This one will give the right
side of your brain a workout as you create and compose amazingly beautiful
and intricate abstract images in your viewfinder. The emphasis here is on
color, composition, line and design.
 Lesson #5 Lesson #5
Arrive, shoot, eat:
FOOD ART
What better idea for a photo
subject? Something you can admire, photograph, and then promptly consume!
What we're shooting in this lesson is food, whether you concentrate on a
handful of almonds, a slice of orange, or a bowl of soup, the key is to
find, light, arrange, compose, click, and then eat your subject matter.
Note: This is not a class on how to take cookbook-quality photographs of
food, so no special lighting or flash will be used or discussed. What
we're concentrating on is taking everyday food items and creating little
(edible) works of art. No specialized equipment necessary.
 Lesson #6 Lesson #6
Is the glass half empty or half full?
HALVES
Sure, you could take a photo of
a vase of flowers, bring it into Photoshop, chop it in half and voila!
you've fulfilled the assignment. But no, there's more to it than that.
This lesson/assignment encourages you to look at the whole and then look
at the half. Can you make an intriguing photo out of just half of
something? The answer is yes, as you'll see. |